Week 11: Molding and Casting
Molding & Casting
Group Assignment
- Review the safety data sheets for each of your molding and casting materials, then make and compare test casts with each of them
- Compare printing vs machining molds
Individual Assignment
- Design a mold around the process you'll be using, produce it with a smooth surface finish, and use it to cast parts
- Extra credit: Use more then two mold parts
CAD Design for the part:
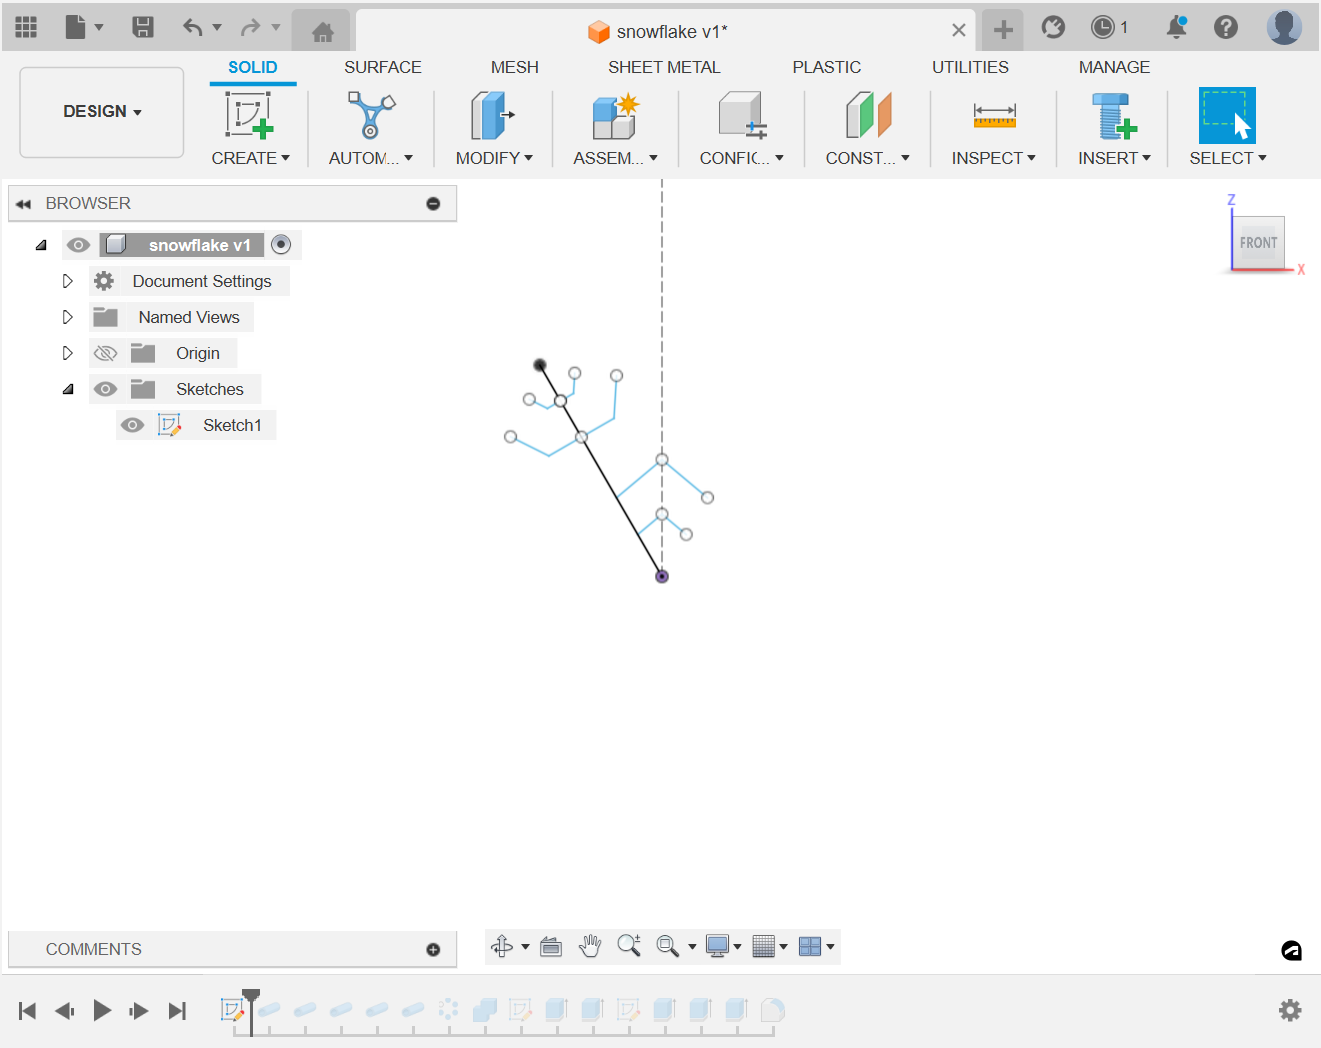
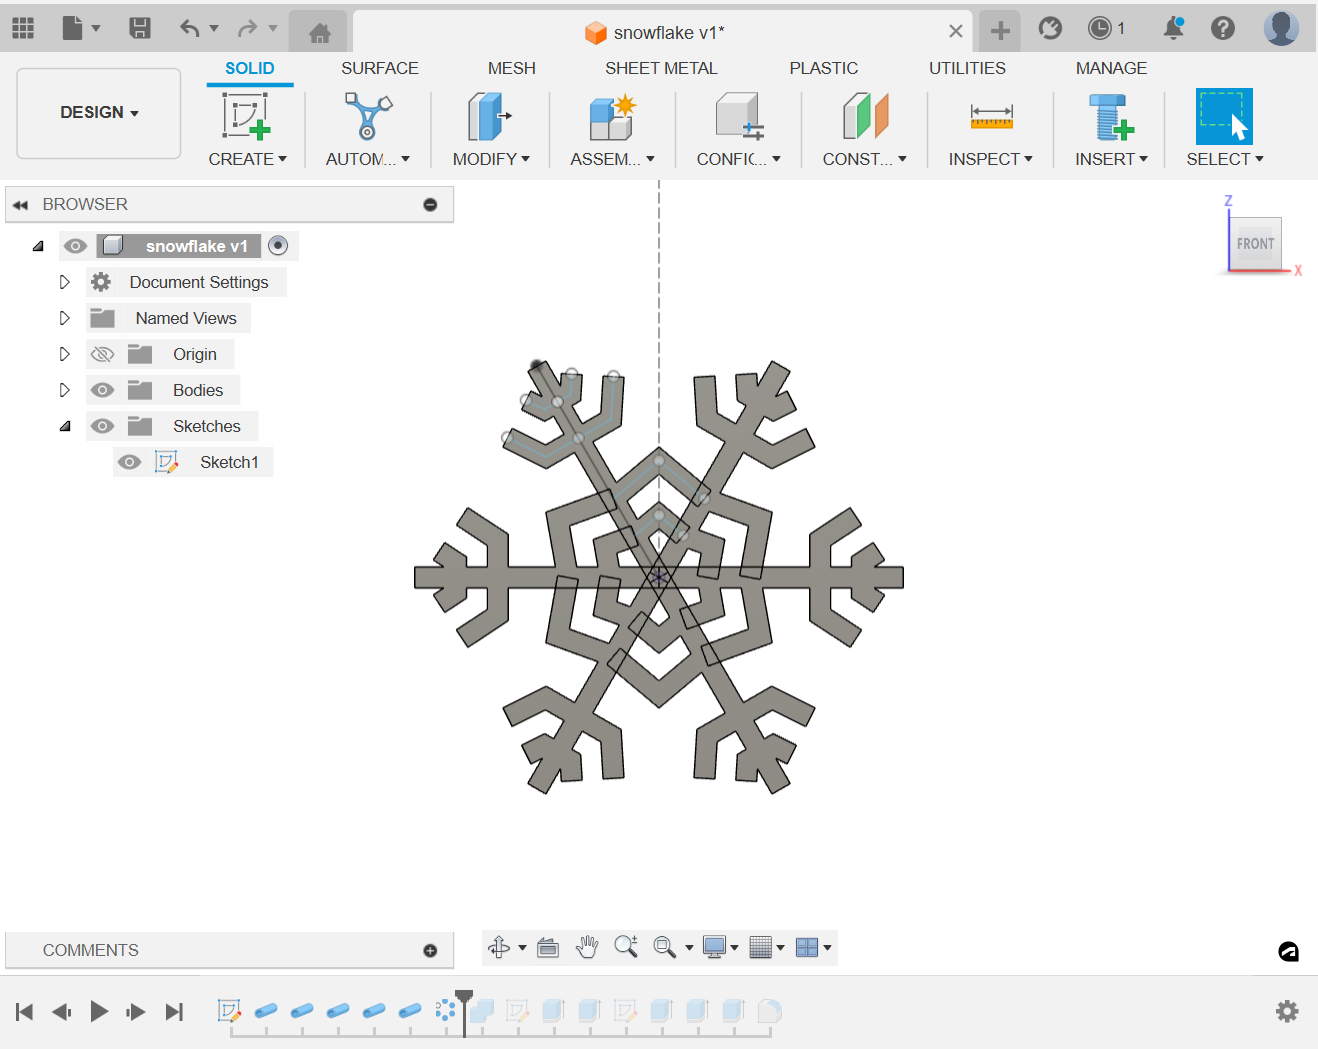
I started designing the snowflake on the Autodesk Fusion interface. I first parametrically sketched the first arm of the snowflake.
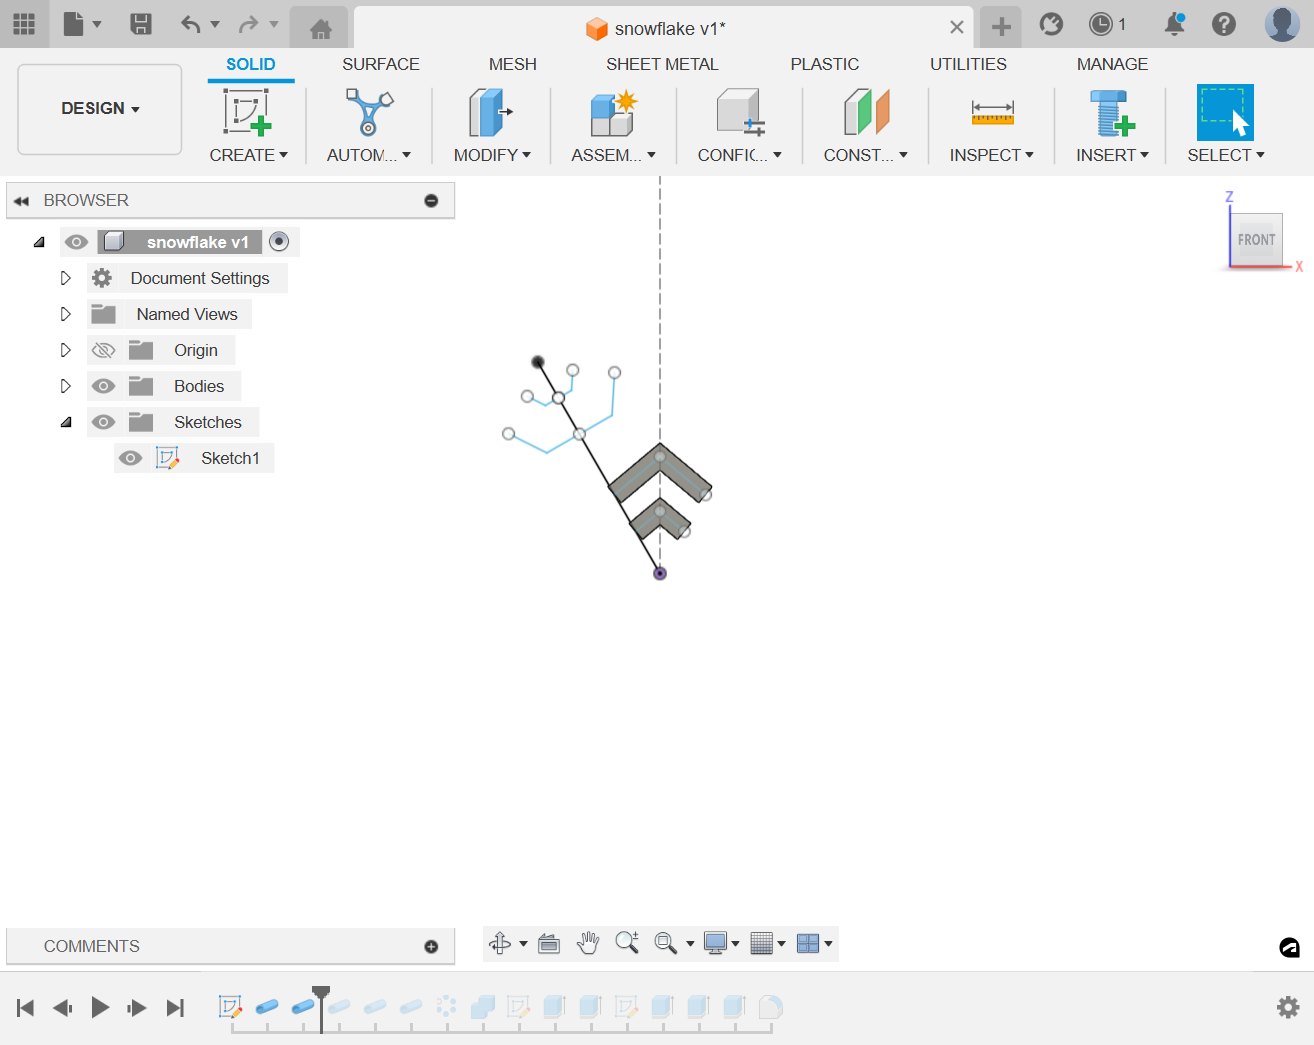
Then, I converted each attribute of the sketch to a square pipe of 3 mm dia and combined it.
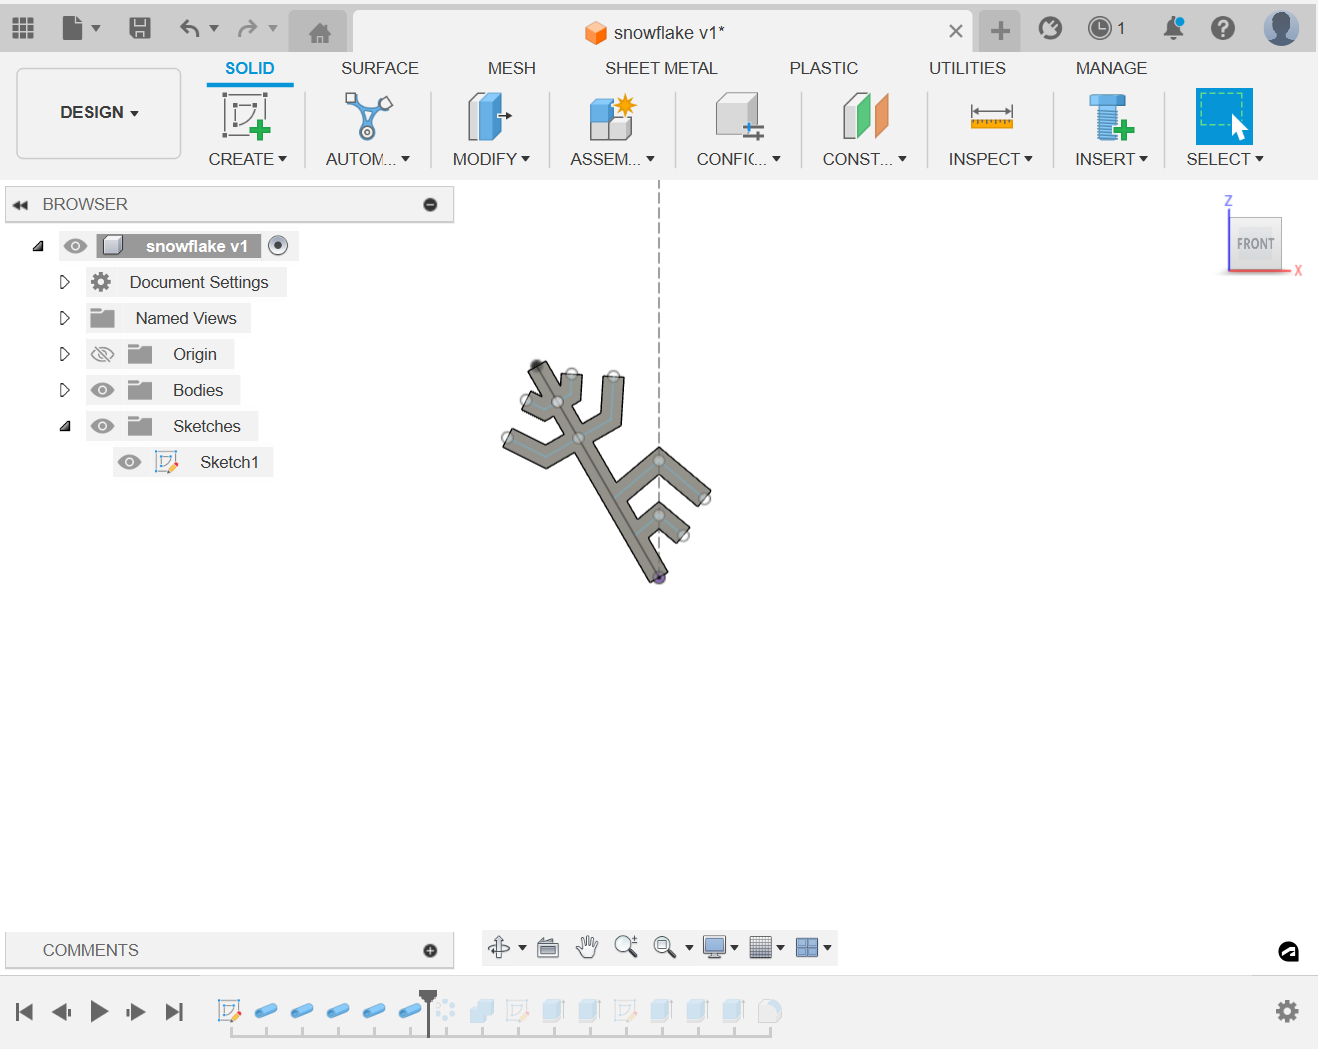
I made circular pattern with 6 numbers and combined it.

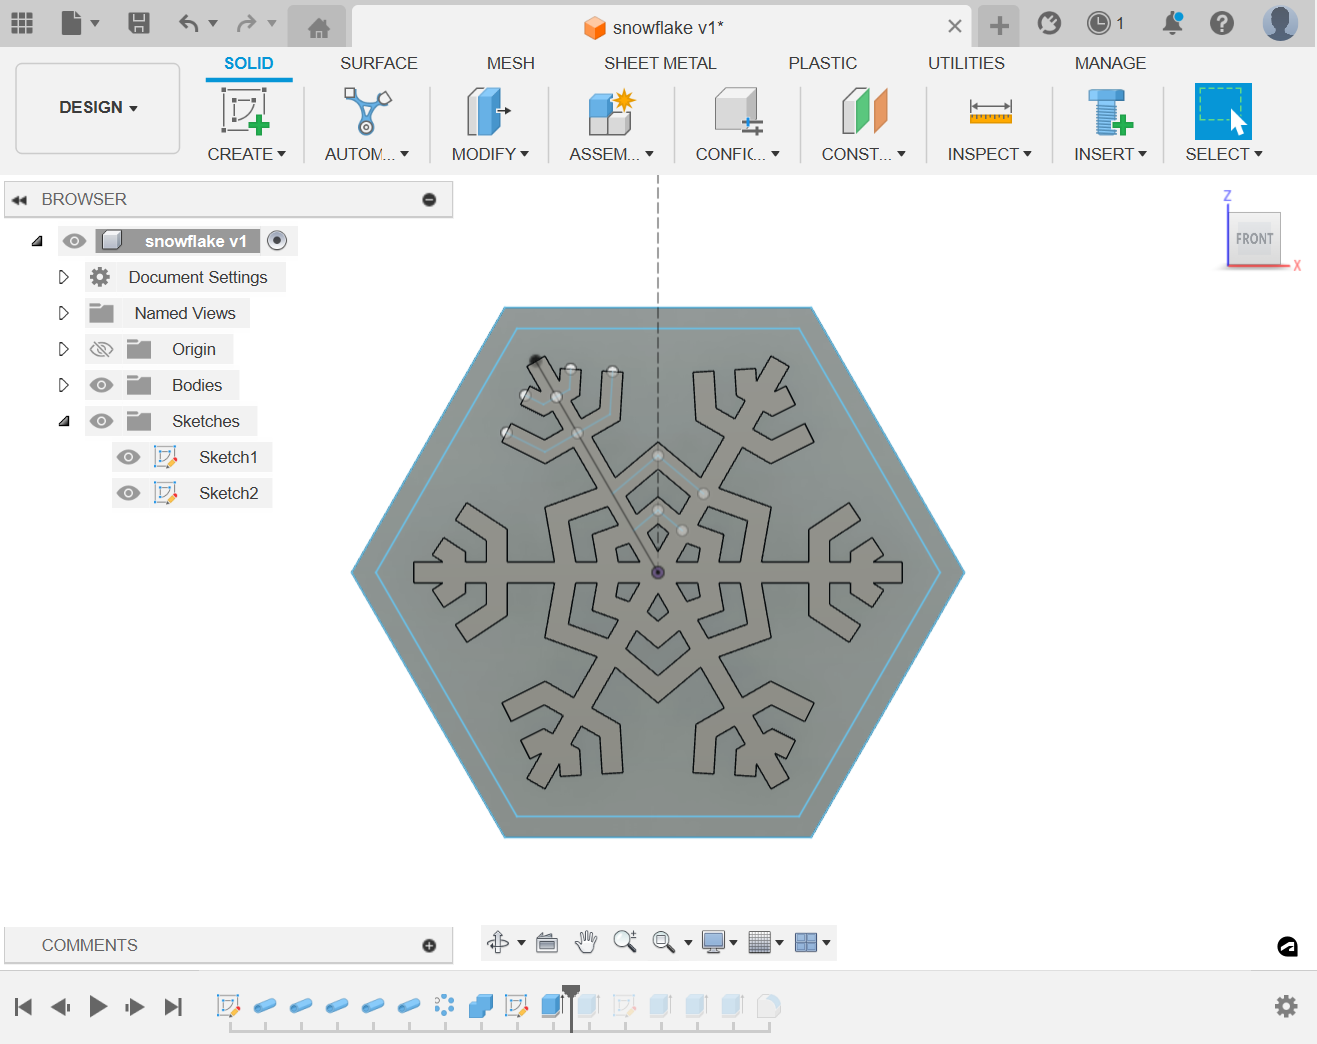
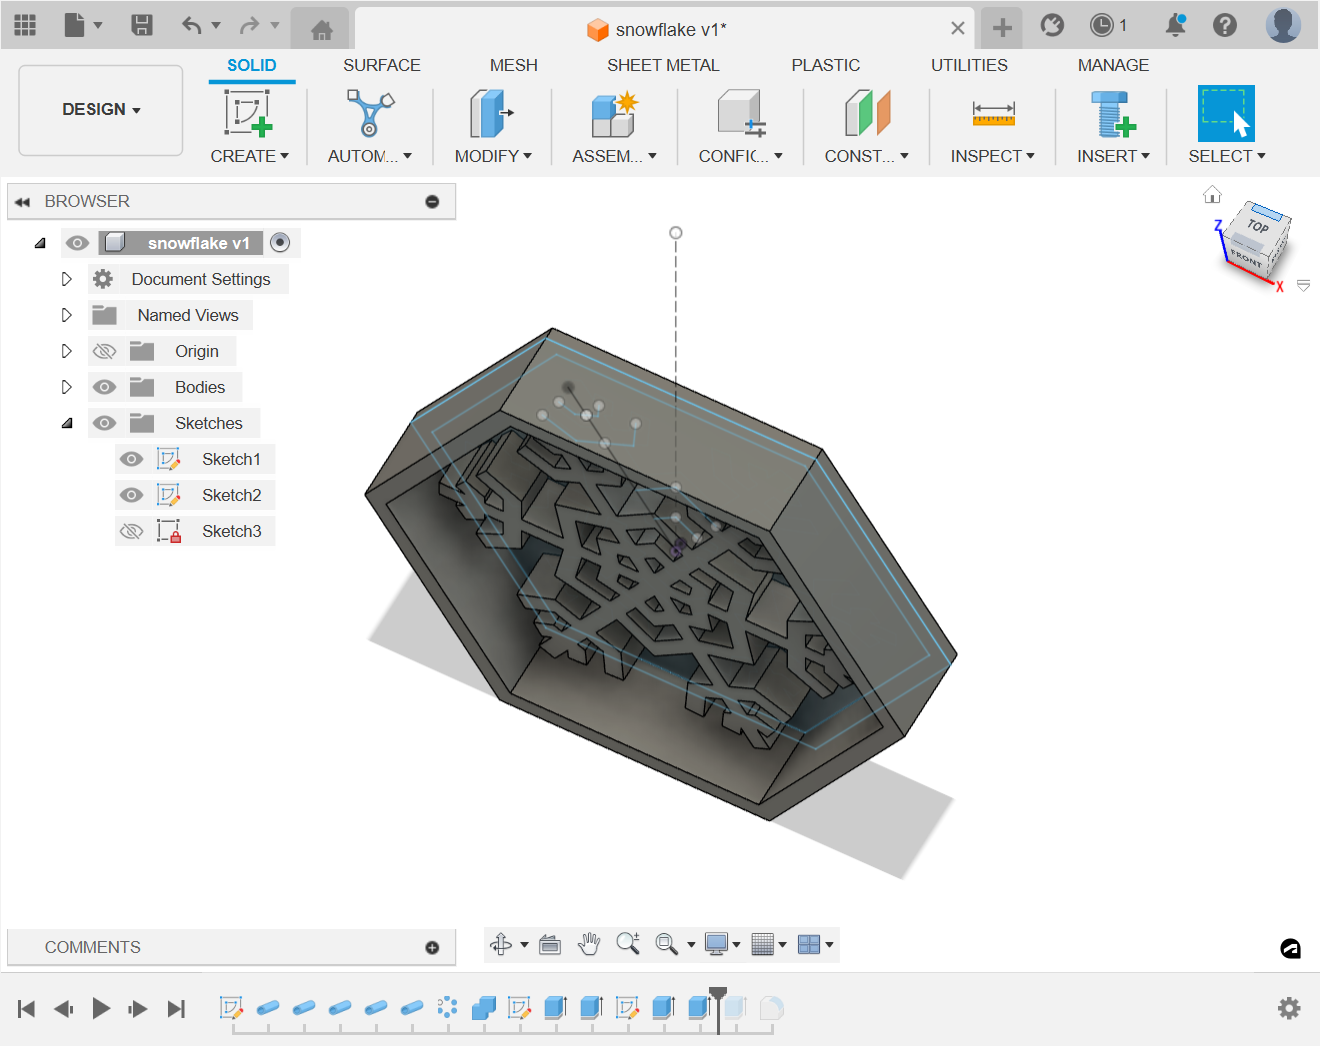
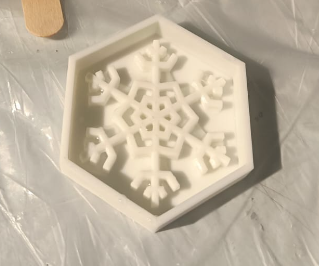
I decided to try 3D printing my mould to pour the silicone and prepare my mold as I wanted to reduce the step of making a box to pour silicone. Hence, I made a polygonal base and a wall of height 8 mm in the design.
3D printing the Mold:
I sliced the design in Prusa and with the settings of 0.15 mm Quality settings.
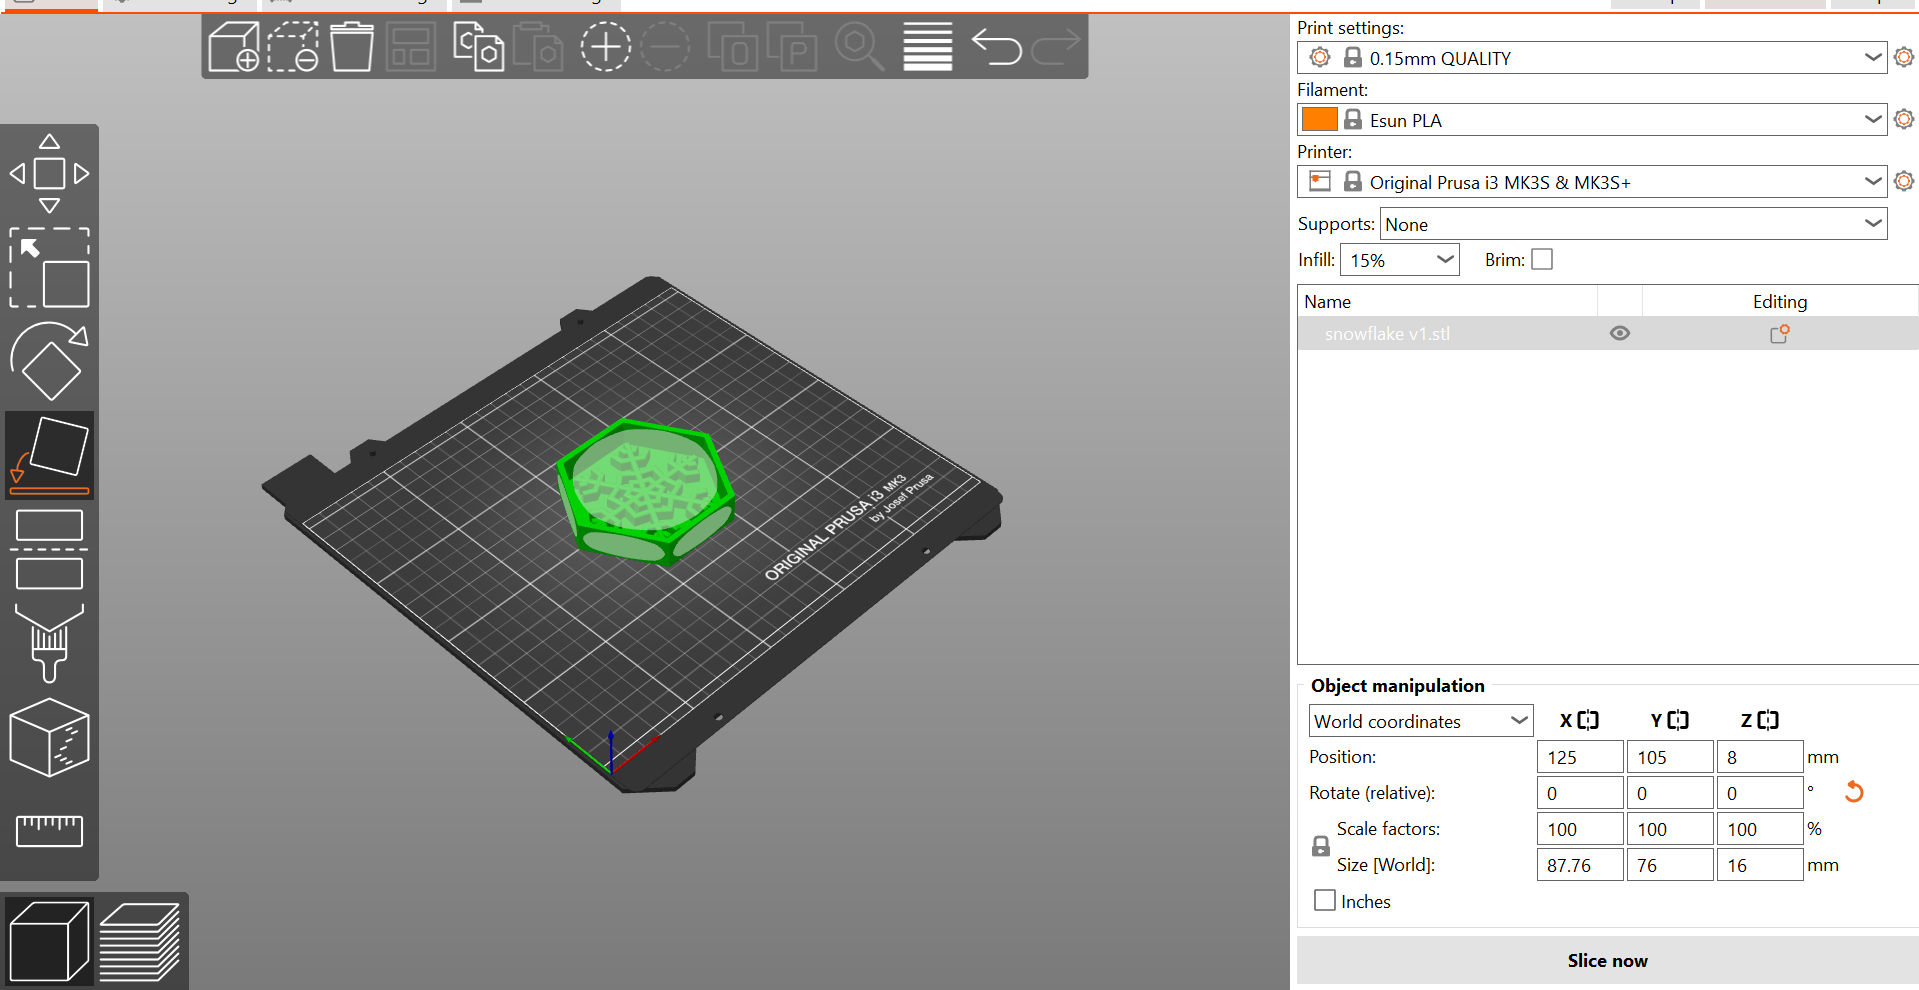
The sliced output looked as follows:

After 3.5 hours, I obtained the following output:
Preparing the silicone for molding:
Materials I Used:
- Silicone rubber - I chose a silicone rubber that’s great for mold making.
- Curing agent - This is mixed with the silicone to set the mold.
- 3D-printed snowflake - I used this as the master model for the mold.
- Mixing cup and stirring sticks .
- Gloves and safety glasses - To protect my hands and eyes.
- Scale - For accurately measuring the silicone and curing agent.
Steps Followed:
Step 1: Preparing My Workspace
Firstly, I made sure my workspace was clean and well-ventilated. I laid out all my materials and tools so everything was within reach. Safety is crucial, so I put on gloves and safety glasses to protect myself from the chemicals.
Step 2: Setting Up the 3D printed mold
I placed my 3D-printed snowflake mold. The mold was made from PLA.
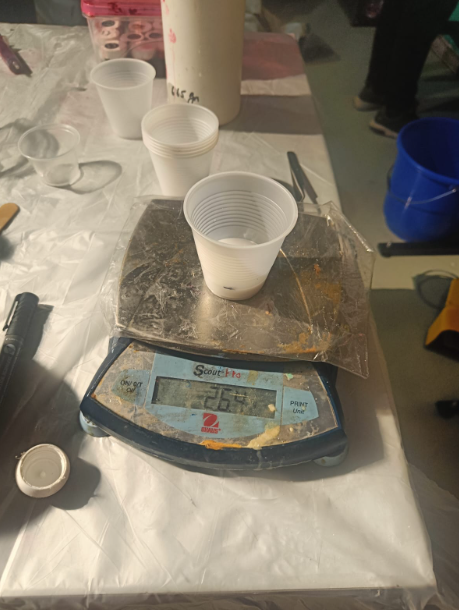
Step 3: Measuring the Silicone and Curing Agent
Using the scale, I carefully measured the parts of silicone rubber and the curing agent according to the manufacturer’s ratio, usually around 40:1. It’s important to get this ratio correct for the silicone to cure properly.
Step 4: Mixing the Silicone and Curing Agent
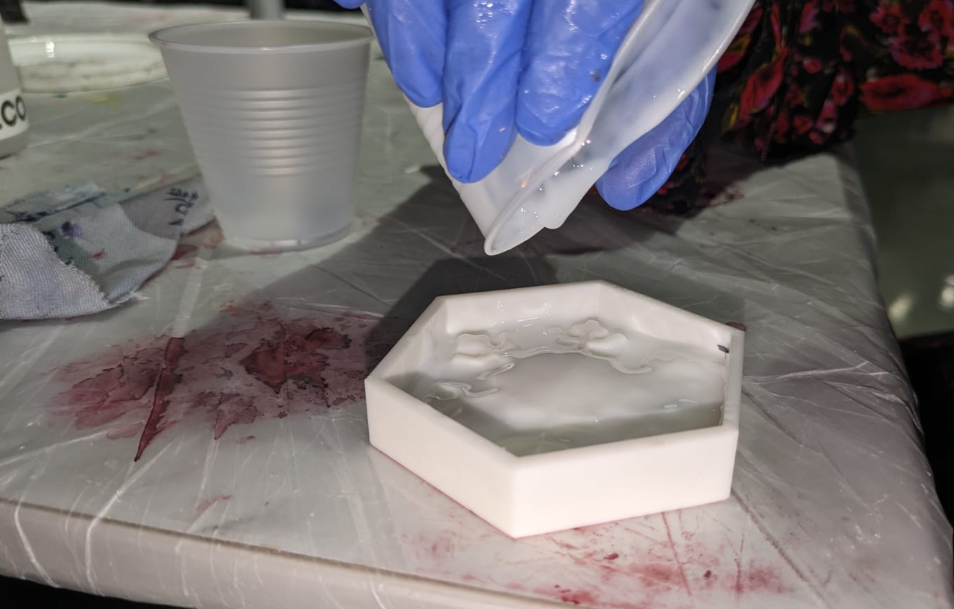
In a mixing cup, I combined the silicone and curing agent. I stirred the mixture slowly and thoroughly to avoid introducing too many air bubbles. The mixing process took a few minutes to ensure everything was completely blended.
Step 5: Pouring the Silicone into the Mold
Slowly, I poured the mixed silicone over the 3D-printed snowflake mold. I poured from one corner and let the silicone flow naturally to avoid trapping air. I made sure the snowflake was completely covered by the silicone.
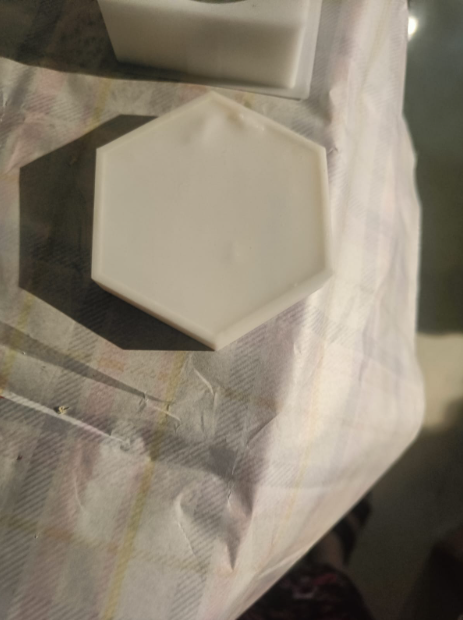
Step 6: Curing the Silicone
I let the silicone sit undisturbed in a well-ventilated area to cure. The curing time can vary, but I left it for about 24 hours to ensure it was fully set.
Step 7: Removing the Mold
Once the silicone had cured, I will gently remove the snowflake mold from the master mold.
Step 8: Safety Cleanup
After completing the mold, I cleaned my workspace. I disposed of the gloves and cleaned all tools with soapy water. Ensuring no silicone or curing agent residues remained is important for maintaining a safe and clean working environment.
Safety Procedures:
- Wear protective gear : Always wear gloves and safety glasses when handling silicone and curing agents.
- Ventilation : Work in a well-ventilated area to avoid inhaling fumes.
- Avoid skin contact : Silicone and curing agents can be irritants, so avoid skin contact.
- Proper disposal : Dispose of any waste materials properly according to local regulations.
Would you like to see images illustrating each of these steps? Let me know if you prefer generated images or photos from sources like Unsplash.
I prepared the silicone mixture by adding one part of curing agent to 40 parts of silicone. I measured the weight of the silicone and curing agent using the weighing scale and prepared the same.
I carefully mixed without bubbles in the back and fro movement suggested and I carefully poured the silicone to the mold.

This is the final output of my silicone which is kept for setting. My instructor told me that it will take 20 h for curing. So I have set it aside.
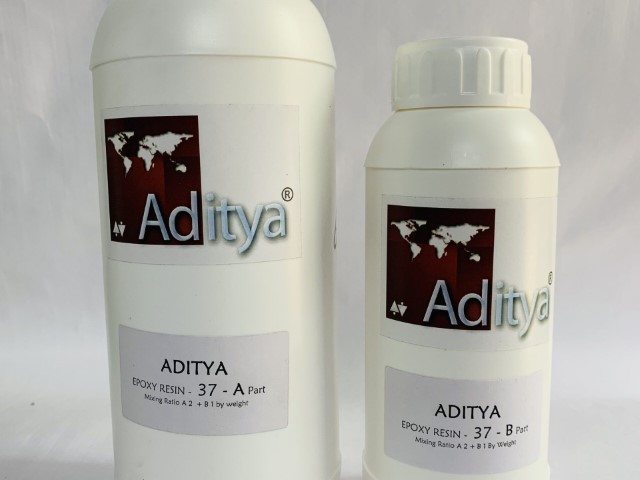
Casting the shape using Epoxy Resin:
Once the mold is set, I will be using the following materials to cast my snowflake. I will add the steps as I perform them.
Materials Used:
- Silicone snowflake mold - The mold that I have desgined.
- Epoxy resin - I used a clear resin for a glass-like finish.
- Resin hardener - Necessary for setting the resin.
- Mixing cup and stirring sticks .
- Gloves and eye protection - Safety first!
- Colorants or glitter (optional) - Some red glitter and a violet colorant for a sparkly effect.
- A drop cloth or newspaper - To keep my workspace clean.
- Torch or heat gun (optional) - For bubble removal.
 I chose the ink and I prepared the epoxy resin for moulding.
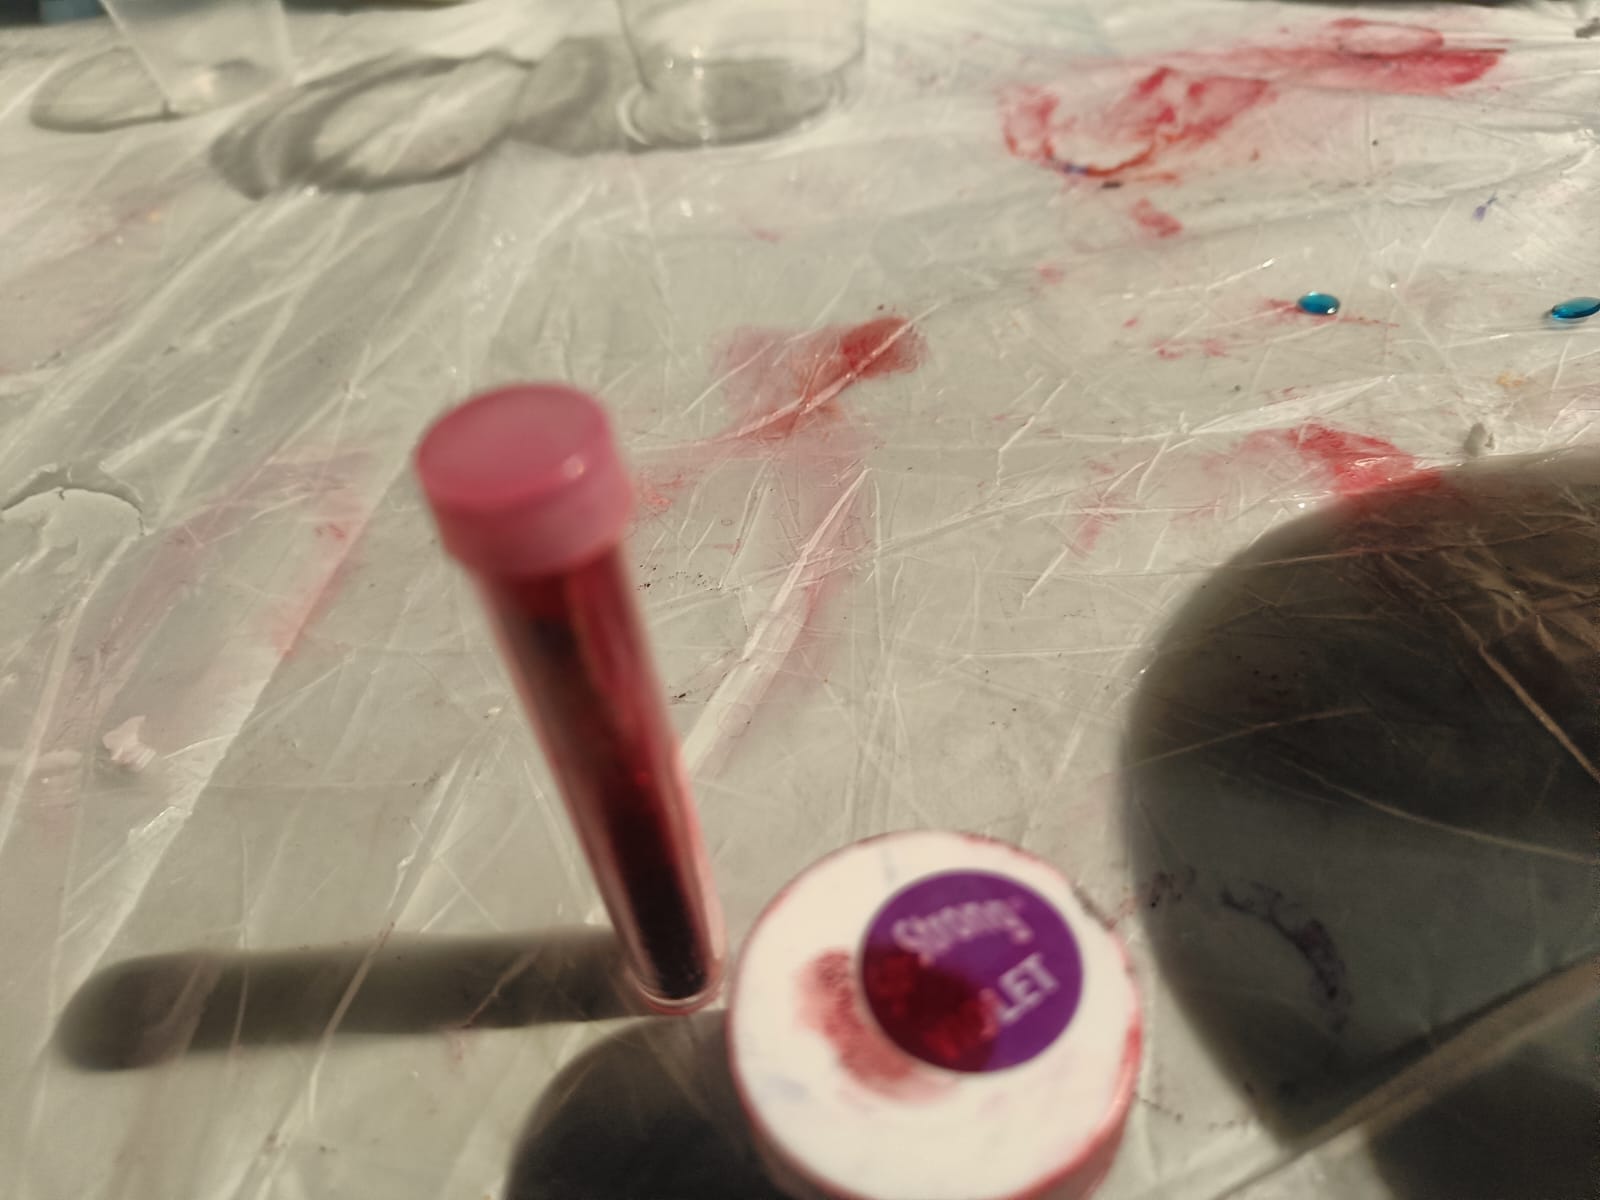 I carefully poured the resin to my moulds.
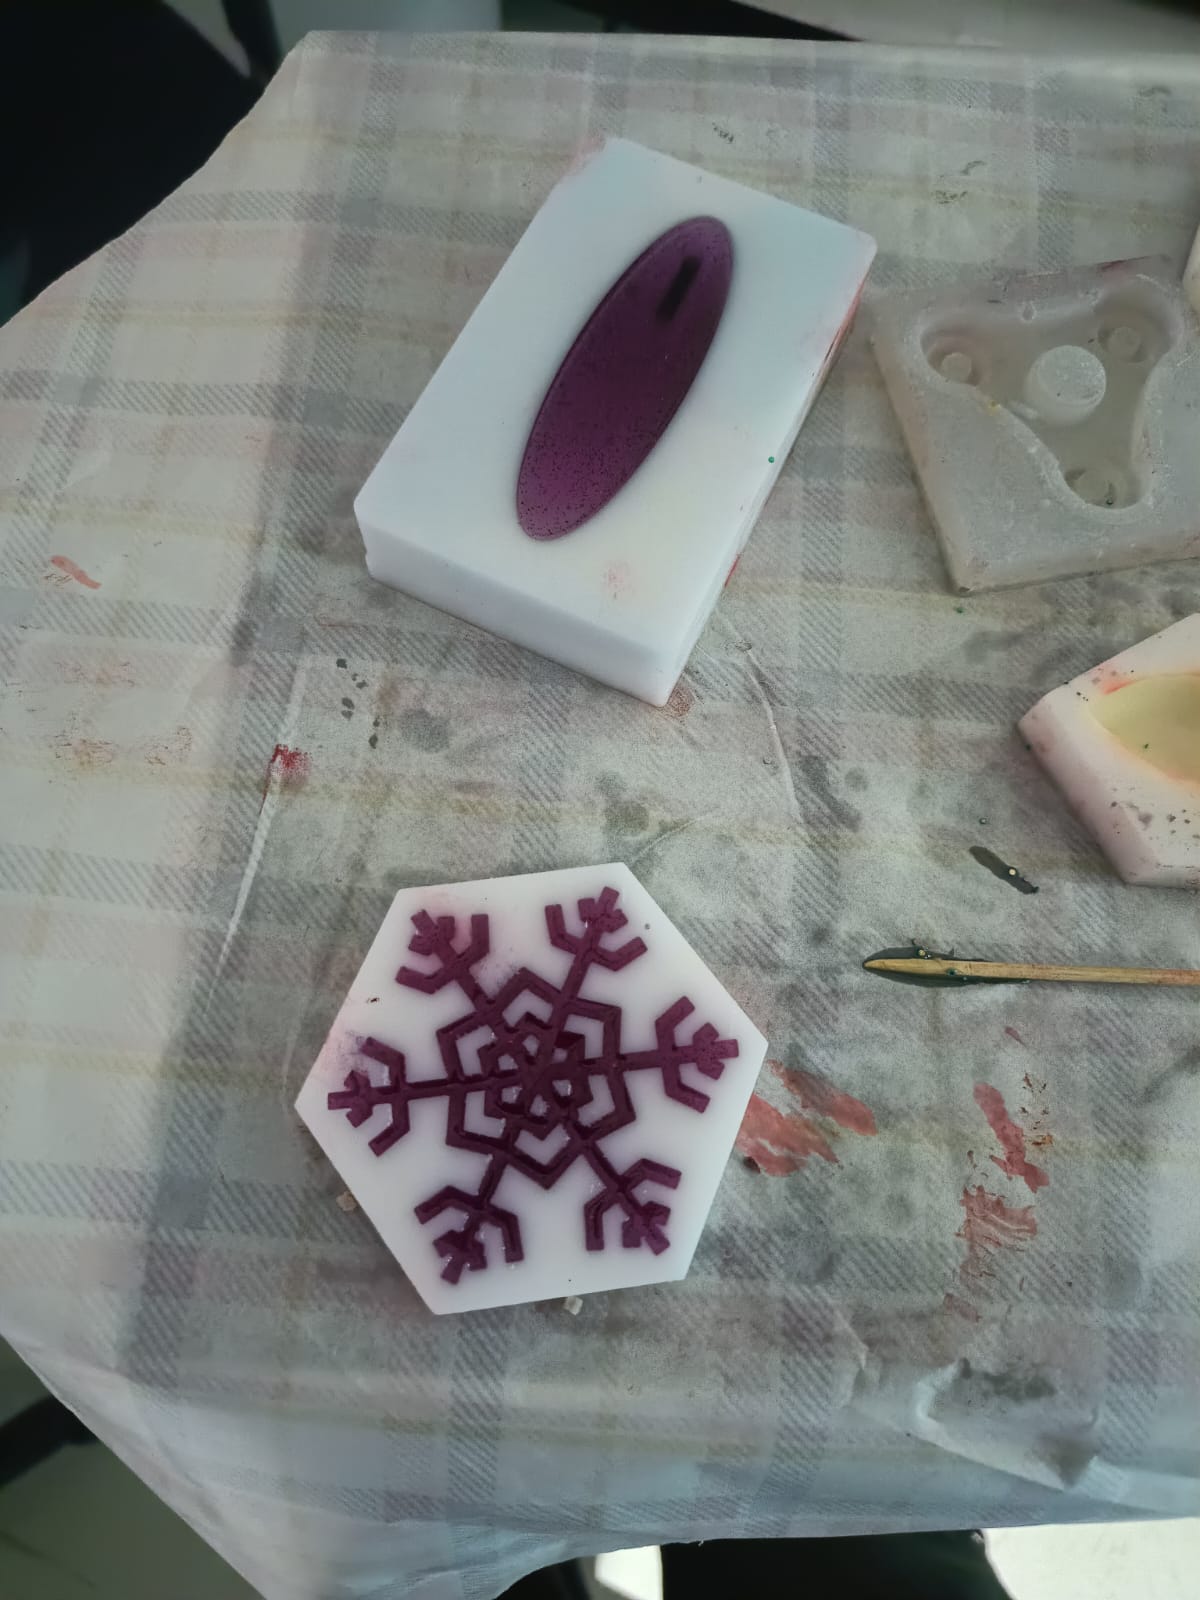
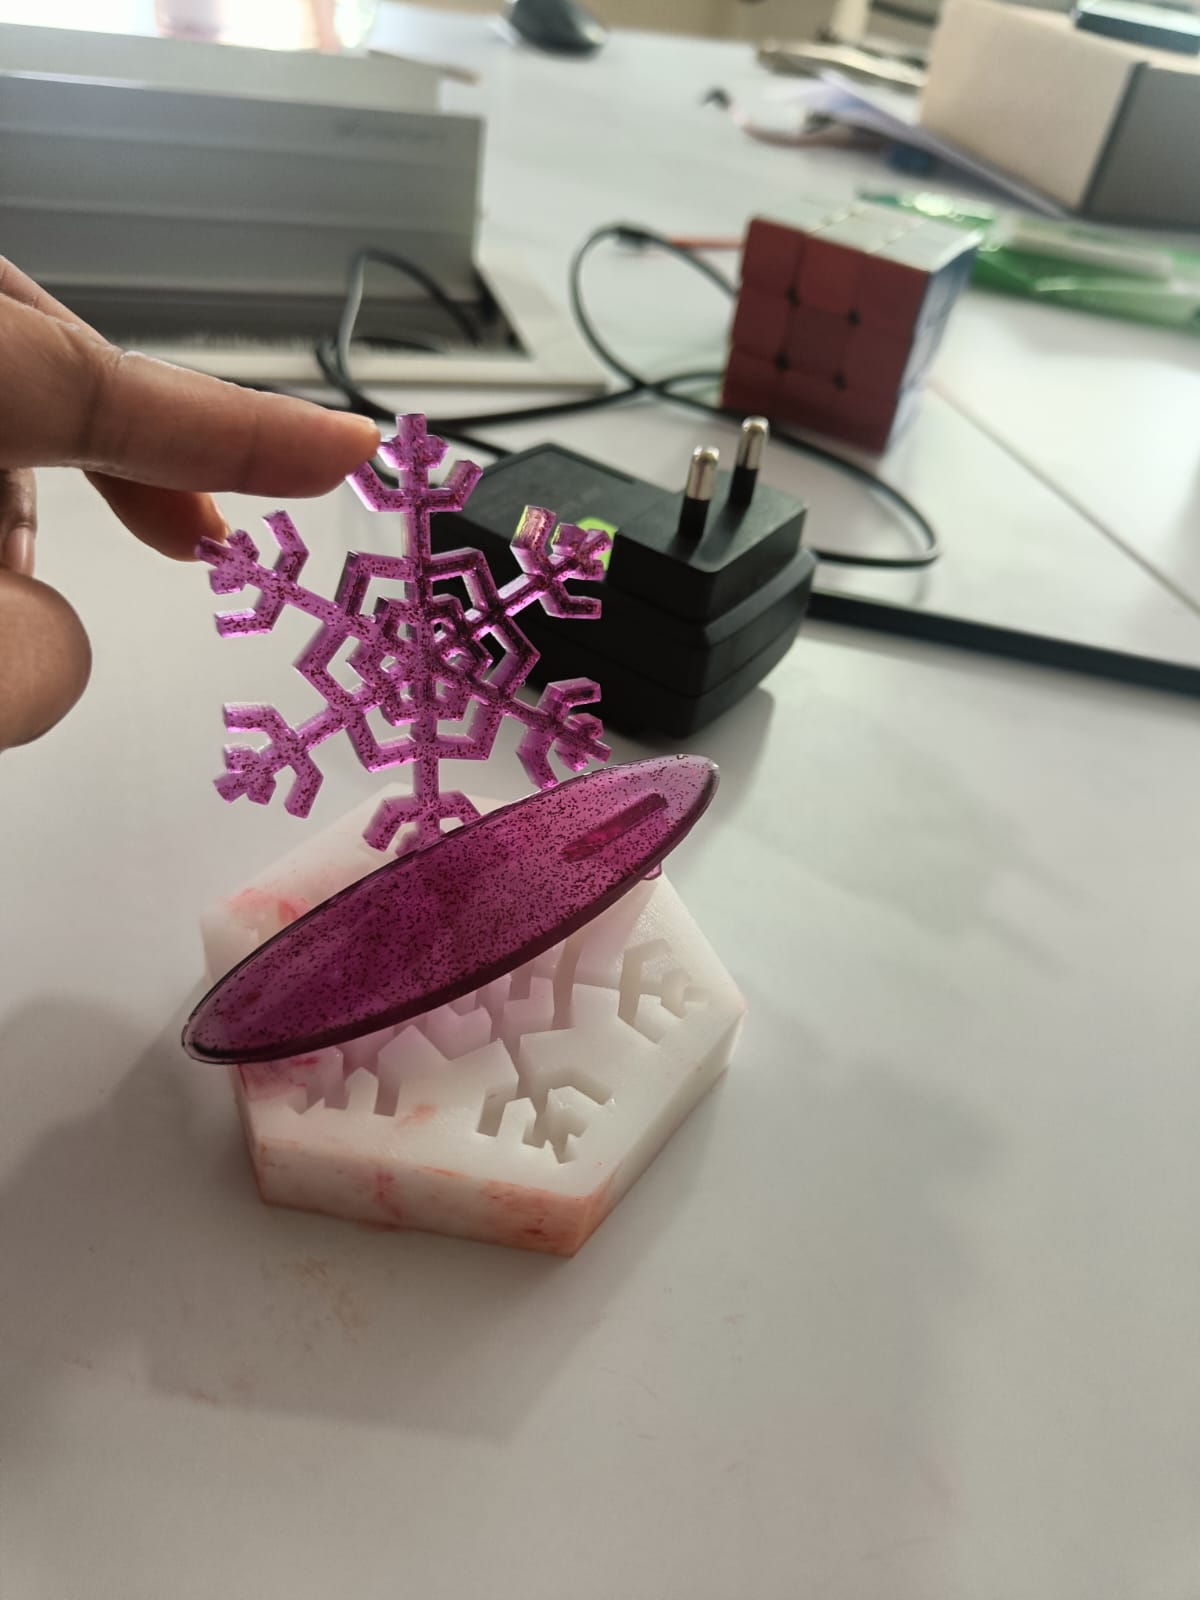
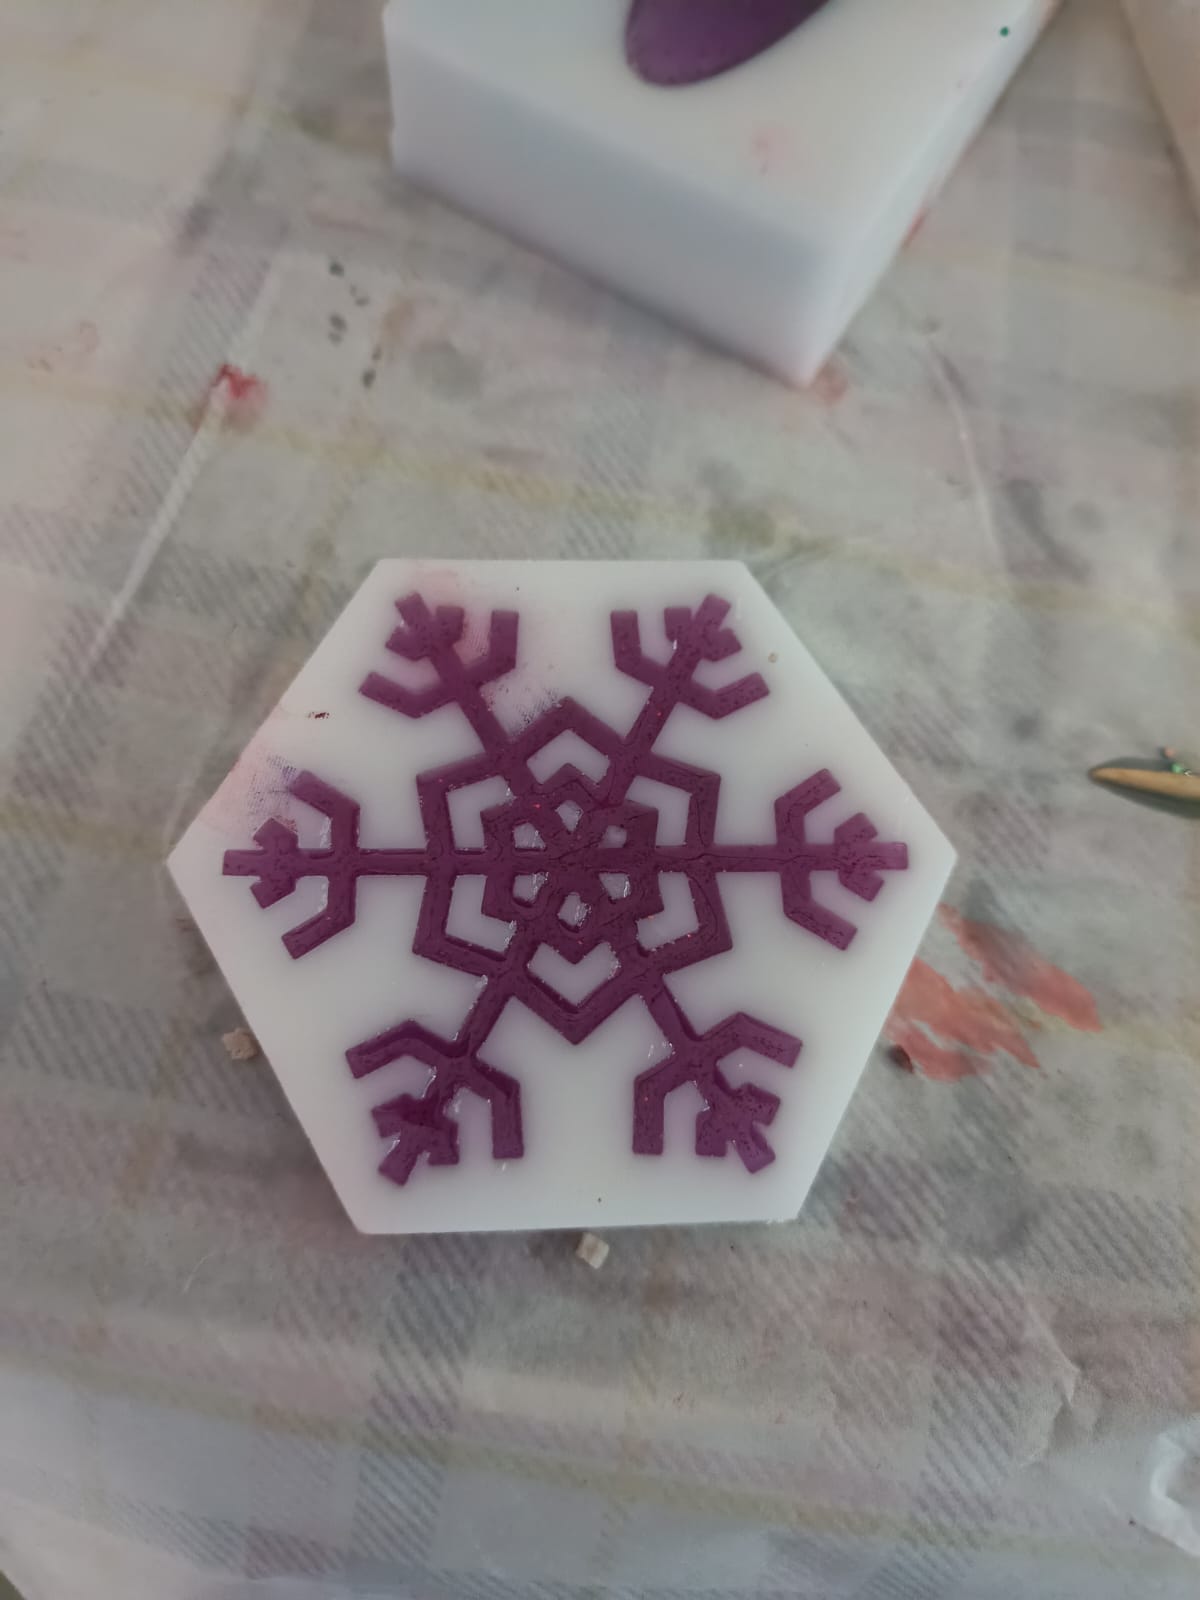 Heroshot:
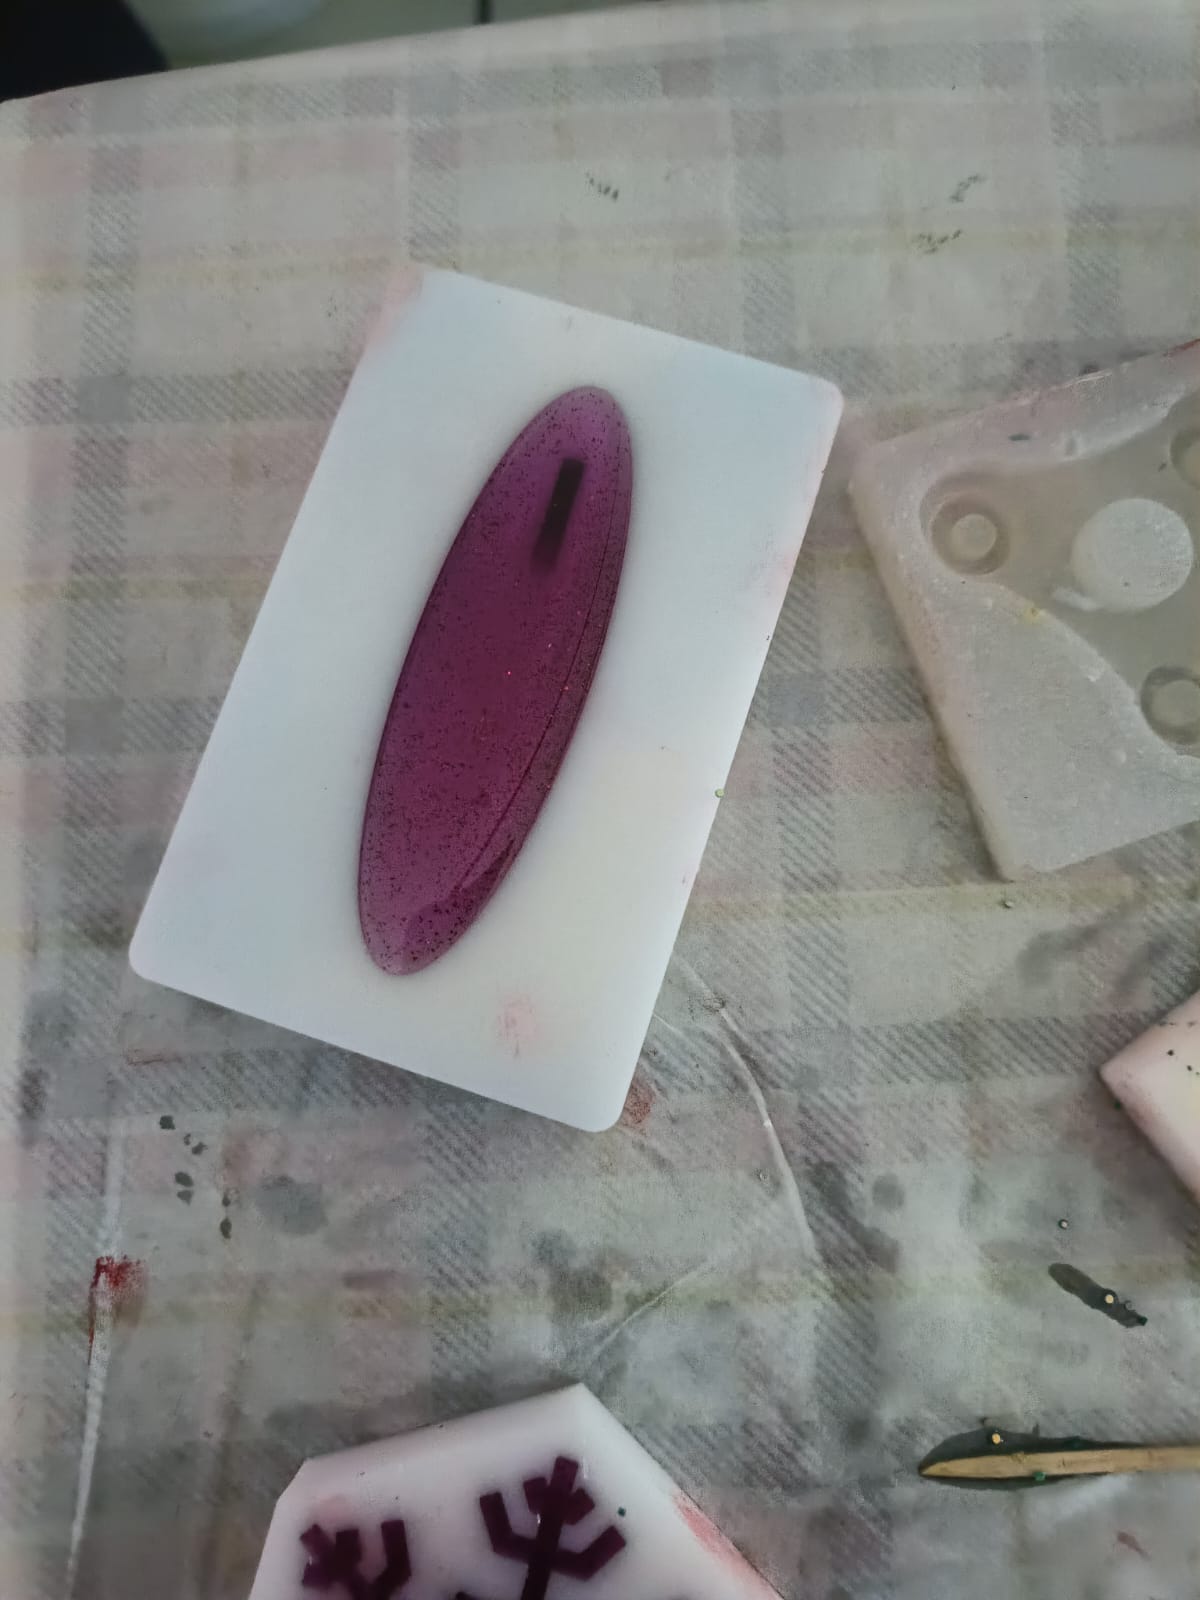
Heroshot